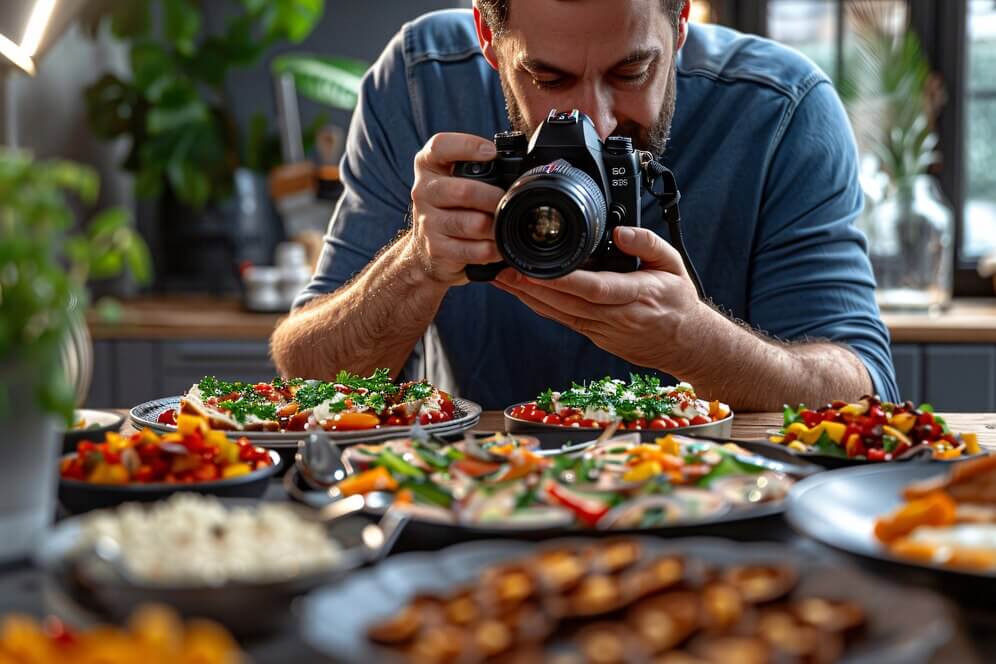
A mouth-watering photo can be the difference between a packed house and empty tables.
Here are some restaurant photography tips to guide you through creating food images that can boost your sales:
Nothing beats natural light when it comes to bringing out the true colors and textures of food. Position dishes near windows to capture that diffused, golden glow. Reflectors can gently bounce light onto shaded areas of the set.
Avoid direct sunlight, which tends to create harsh shadows and highlights. For warm, flattering illumination, shoot during the golden hour shortly after sunrise or before sunset.
Softening harsh daylight with sheer curtains also produces a natural look. You can also try side-lighting casts for dramatic shadows across meals for moody, artistic shots.
It’s amazing how shadows can transform the look of a dish. Use black foam boards to create intentional shadows that add depth and interest to your photos.
Experiment with hard vs. soft shadows to convey different moods – hard shadows for a dramatic, high-contrast look, soft shadows for a more subdued, romantic feel. Use shadows to add dimension to flat dishes like pizza or pasta.
You can also create a chiaroscuro effect by lighting your subject from one side and letting the other fall into deep shadow for a stunning, dramatic image.
Finally, use gradient lighting to guide the viewer’s eye towards the most important part of your dish. Don’t be afraid to play around and see what works best for each photo!
This IG post below from Seen Restaurant & Bar Bangkok exemplifies the power of using shadow for creative restaurant food photography. The dark background creates a dramatic contrast, allowing the glistening meat and vibrant garnishes to pop.
At the same time, the strategic lighting casts alluring shadows that enhance the dish’s texture and depth, drawing the viewer’s eye.

Artificial lighting opens up creative possibilities. Low-key lighting, for example, creates an intimate, moody effect that works well for darker restaurants or dinner scenes. Try backlighting by positioning a light source behind the main subject to emphasize the colors and textures.
Colored lighting gels are another easy way to set a creative tone or mood that matches the food you’re featuring.
Don’t forget small practical lights as well, like candles or string lights in the background. A little light painting with handheld flashlights during long exposures can yield unique effects too.
And for highlighting specific details, a small LED panel comes in handy for precise control.
Reflective materials inject photos with depth and visual interest. Shoot a dish with a mirror underneath to capture a reflection. Glassware and silverware also make great reflective props.
Misting foods with a spray bottle produces tiny water droplets that appear as points of light. Metallic backdrops like gold, silver, or copper bounce light around in unique ways. Even something as simple as a prism can introduce creative flares and rainbow effects.
The plate, bowl, or board you present each dish on is part of the story. Use clean serveware so the food takes center stage. Try using branded plates as they reinforce your restaurant’s professional image.
Garnish with herbs, oils, or sauces that tie into the meal’s flavors. Negative space around the food helps it stand out.
Consider adding texture as it adds depth and interest, making your dishes look more appealing.
Use crumpled parchment paper as a backdrop for a rustic, homemade feel. Play with contrasting textures, like a smooth sauce drizzled over rough, crusty bread.
Finally, use complementary colors in your props to enhance the natural hues of your dish and create an appealing color palette.
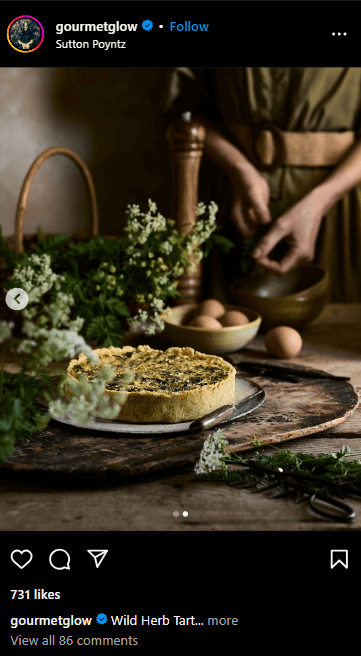
This Instagram post exemplifies presentation elevation with props masterfully. The rustic wooden surface, delicate white flowers, and vintage-style plate create a cohesive, inviting atmosphere.
These carefully chosen props enhance the tart’s appeal, adding depth and context to the scene. The subtle inclusion of eggs and kitchen tools in the background further enriches the narrative, inviting viewers to imagine the cooking process.
In the world of restaurant kitchen photography, perfection can be overrated. A little intentional “mess” can make your dishes look more approachable and authentic.
Allow some crumbs, drips, or splatters to remain on the plate or surrounding surface. It suggests that the food is so irresistible, someone couldn’t wait to dig in.
Capture action shots, like a fork twirling pasta or a hand reaching for a bite. These images convey movement and make your dish look more enticing.
Leave utensils in the frame, as if someone is about to enjoy the meal. It creates a sense of anticipation and makes your food look more inviting.
Don’t be afraid to show partially eaten food. A few bites taken out of a burger or a slice of pizza can imply that it’s too delicious to resist. Incorporate human elements, like hands holding a dish or reaching for a drink. It adds relatability and makes your photos feel more authentic.
Remember, a little mess can go a long way in making your food photos more engaging and appetizing.
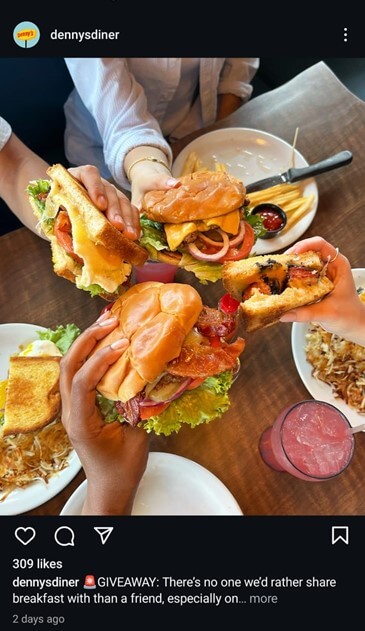
For example, this post by Denny’s captures multiple hands reaching for and holding various breakfast items, creating a sense of spontaneity and shared enjoyment.
The slightly disheveled arrangement of the food, with sandwiches at different angles and plates overlapping, adds to the authentic, lived-in feel of the scene. This controlled chaos makes the meal appear irresistibly tempting and real-world relatable.
Every dish has its star players, and it’s your job to make them shine in your photos. Identify the one or two standout components of your dish, like a perfectly seared steak or the melting cheese.
Give your heroes plenty of breathing room on the plate. Don’t overcrowd them with too many supporting ingredients. Use complementary ingredients to enhance your star players without stealing the spotlight. A sprinkle of green onions can enhance a bowl of ramen without distracting from the main event.
Play with selective focus to draw attention to your key ingredients. Use a shallow depth of field to blur out the background and make your heroes pop. Get up close and personal with your standout components. Shoot extreme close-ups to showcase their unique textures or details.
Capture the process of adding the finishing touches to your dish, like a sprinkle of flaky salt or a drizzle of olive oil. These final flourishes can make your heroes look even more enticing.
One angle is never enough in food photography. To truly showcase your dishes, you need to shoot from multiple perspectives. Start with a classic top-down shot to showcase all the ingredients in your dish. This is a great way to highlight the colors, textures, and composition of your plate.
Experiment with depth of field by shooting from a lower angle. This can create a more immersive, “diner’s eye view” of your food. Get up close and personal with your ingredients by shooting macro shots. These extreme close-ups can reveal interesting textures and details that might be missed from farther away.
Try shooting from a 45-degree angle for a classic, editorial-style shot. This is a great way to showcase the layers and height of your dish.
Don’t be afraid to get creative with unconventional angles, like a straight-on shot or a tilted frame. These unexpected perspectives can add visual interest and make your photos stand out.
Finally, capture overhead flat lays for a menu-style shot. This is a great way to showcase multiple dishes or ingredients at once and can be useful for website or social media graphics.
Melted ice cream, wilted greens, and congealed sauces are not exactly Instagram-worthy.
To avoid this, work swiftly and efficiently. Have your camera settings and composition planned out before the plate arrives. Then, snap away before the food’s freshness fades.
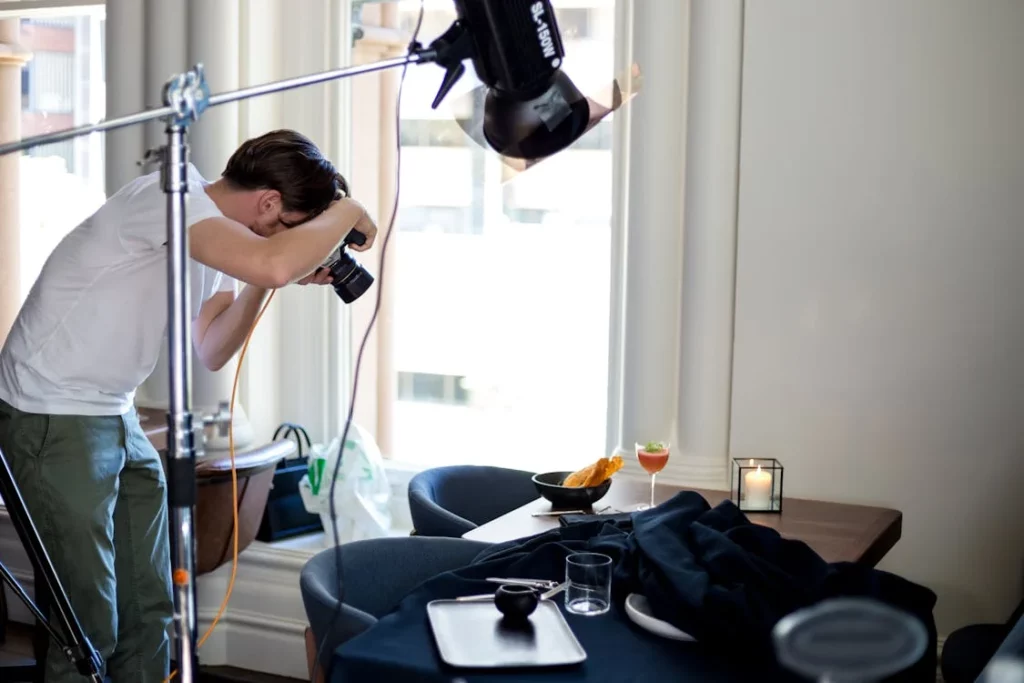
But don’t just focus on the final product. Some of the most compelling food images are candid shots of the kitchen in action. The sizzle of a steak hitting the grill, the flutter of hands plating a dish – these behind-the-scenes moments add authenticity and story to your feed.
Capture steam rising from a freshly baked pie or smoke wafting off a smoked brisket to convey warmth and aroma.
Finally, consider documenting the entire plating process from start to finish. This series of images can create a narrative arc that showcases your chef’s artistry and gives viewers a deeper appreciation for the dish.
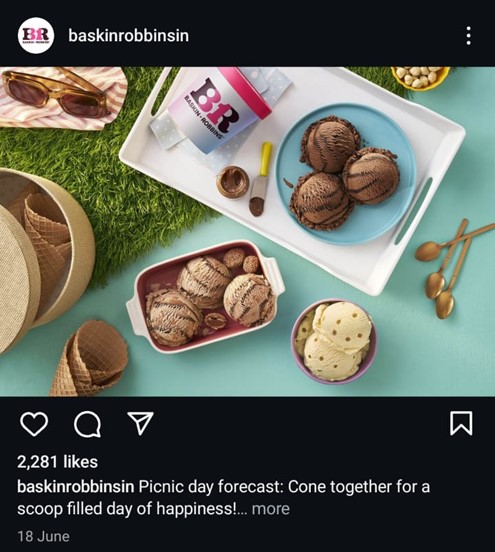
The following Baskin-Robbins post is the perfect example of how being quick and candid pays off. The scoops look pristine and appetizing, suggesting the photographer worked quickly to capture the ice cream at its best before melting.
The casual setting adds an authentic, candid feel, making the scene relatable and enticing to viewers.
Composition is the foundation of any great photograph, and food images are no exception. By arranging the elements within your frame in a thoughtful, intentional way, you can create images that are both visually appealing and emotionally impactful.
One classic composition technique is the rule of thirds. Imagine your frame divided into a 3×3 grid. By placing your main subject along these lines or at their intersections, you create a balanced, harmonious image that’s pleasing to the eye.
Leading lines are another powerful tool. Use the natural lines and curves of your food (think: the spiral of a cinnamon roll or the linear arrangement of sushi) to guide the viewer’s eye through the frame and towards the focal point.
Symmetry and asymmetry can also be used to great effect. A perfectly centered scoop of ice cream on a cone creates a sense of order and balance, while an off-center slice of pie can feel more dynamic and intriguing.
Repetition of shapes or colors, such as a row of colorful macarons or a stack of pancakes, can create a cohesive, visually striking image. And don’t forget about negative space! Allowing your dish to “breathe” within the frame can make it feel more elevated and refined.
One of the biggest challenges in food photography at a restaurant is achieving accurate color representation. This is because the ambient lighting in the restaurant can cast unsightly color casts.
To combat this, take control of your white balance. Use your camera’s custom white balance settings or a gray card to neutralize any unwanted color casts.
That said, don’t be afraid to experiment with warmer or cooler tones to evoke a certain mood or feeling. A slight warmth can make a dish feel cozy and inviting, while a cooler tone can convey freshness and sophistication.
In post-processing, you can fine-tune your color balance by adjusting individual color channels. This allows for precise control over the hues in your image.
Finally, consider the emotional impact of color on appetite. Studies have shown that certain colors, like red and yellow, can stimulate hunger, while others, like blue, can suppress it. Use this to your advantage by highlighting colors that will make your dishes look their most tantalizing.
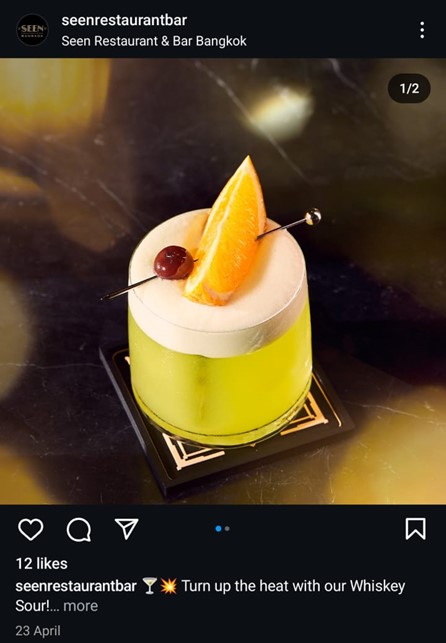
This post is a great example of refining white balance. The Whiskey Sour is captured with vibrant, true-to-life colors, highlighting the drink’s zesty and refreshing nature.
The accurate color representation enhances the drink’s appeal, making it look even more tantalizing.
With a few simple tweaks, you can take your food photos from good to great, enhancing the mood and appetite appeal of your dishes.
Start by boosting the contrast slightly. This will make your image pop and give it more depth and dimension. Just be careful not to overdo it, as you don’t want to lose important details or texture.
To make your food really stand out, try desaturating the background elements slightly. You can also selectively enhance the colors of your ingredients to make them look as fresh and appetizing as possible.
Clarity and texture are also important considerations. By adjusting these settings, you can emphasize the appetizing details of your dish, from the crispy edges of a fried egg to the glistening droplets on a ripe tomato.
Sometimes, global adjustments to your image aren’t enough. That’s where selective editing comes in. By making targeted tweaks to specific areas of your image, you can really make your dish shine.
Use adjustment brushes to enhance certain elements, like brightening the highlights on a glossy sauce or deepening the shadows on a piece of grilled meat. You can also use these brushes to selectively sharpen key focal points, like the crumb topping on a slice of pie or the sesame seeds on a sushi roll.
Gradients are another useful tool for selective editing, allowing for a smooth transition.
In some cases, you may need to remove distracting elements or imperfections from your image. The clone stamp tool is your best friend here, letting you seamlessly blend in surrounding textures to cover up any unwanted blemishes.
For even more precise control, try using luminosity masks. These allow you to make targeted adjustments to specific tonal ranges within your image, ensuring that your edits blend seamlessly and naturally.
Your food photography will likely be viewed across a variety of platforms, from your website to social media feeds. To ensure that your images look their best no matter where they’re seen, it’s important to optimize them for each specific platform.
Start by resizing your images to the appropriate dimensions for each site. Nothing ruins a great food photo like an awkward crop or pixelation from improper sizing.
Next, consider creating different variations of each image to suit the specific requirements of each platform. For example, you may want to create a square crop for Instagram, a vertical shot for Pinterest, and a horizontal image for your blog.
Don’t forget about text overlays! Adding captions or labels to your images can be a great way to provide additional context or promote specific menu items. Just be sure to use a legible font and keep the text concise.
When posting on social media, aim for a consistent posting style across all platforms. This ensures a cohesive brand identity.
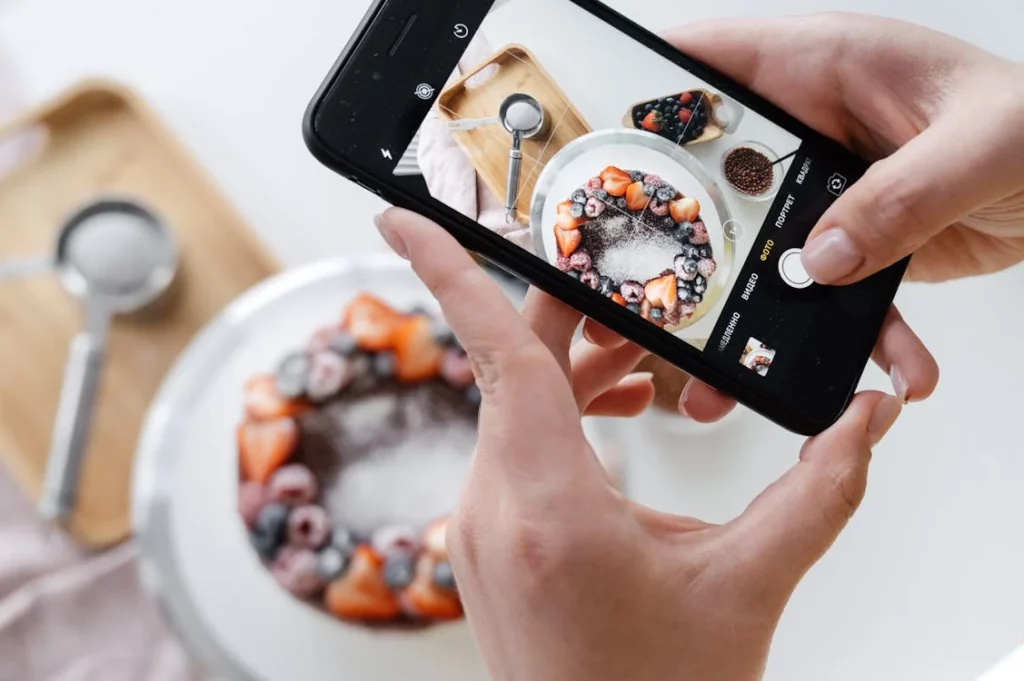
Gone are the days when you needed a fancy DSLR to capture drool-worthy food photos. Just because you’re using a phone doesn’t mean you have to settle for mediocre shots.
So, here are 6 tips to help you nail restaurant and food photography using your phone:
One of the simplest food photography tips for a restaurant using phones to capture their images is to turn on the grid function in your camera settings. This overlays a 3×3 grid on your screen, which you can use to compose your shots based on the rule of thirds.
The idea is to place your main subject along one of the grid lines or at the intersection points, rather than dead center in the frame. This creates a more balanced, visually appealing composition that draws the viewer’s eye into the image.
Many smartphones, including iPhones, have the grid function built-in. Simply go to your camera settings and toggle the grid option on. You can also use third-party camera apps that offer even more control over your grid display.
The Portrait Mode feature on many camera-centric smartphones, especially the newer iPhone models allows you to artistically blur backgrounds while keeping your main subject sharp. This mimics the “bokeh” effect of professional cameras.
When shooting overhead shots of plated dishes or close-ups of ingredients, switch to Portrait Mode and adjust the simulated aperture for gorgeous, professional-looking images. The sweet spot is often between f/4.0 to f/5.6.
Sometimes, the most compelling food photos are the ones that capture a moment in time – like a drizzle of sauce being poured over a dish or a fork twirling up a bite of pasta. But these action shots can be tricky to nail, especially when you’re working with a slower shutter speed on a phone camera.
That’s where burst mode comes in handy. This function allows you to take multiple shots in rapid succession by simply holding down the shutter button.
Then, you can go back and select the best image from the bunch, ensuring that you don’t miss a single moment.
Burst mode is built into most smartphone cameras. To use it, simply hold down the shutter button (or one of the volume buttons) when you’re ready to snap your shot. The camera will keep taking photos until you release the button.
This is a great way to capture dynamic, in-the-moment shots and create viral-worthy GIFs without blur or missed focus.
Just be sure to clean out your camera roll afterward, as burst mode can quickly fill up your storage space with duplicate images.
The updated macro mode on the iPhone 13 Pro and Pro Max models lets you capture tiny details and textures that normally only high-end DSLRs can capture.
Use macro mode when showcasing intricate food textures, patterns, and details. The ultra-close focus will highlight everything from the seeds on a bun to the crispy bits on croutons to the subtle marbling on a steak.
Getting creative with macro shots is an easy way to make your iPhone food photography stand out.
The moody, intimate lighting inside many restaurants can be aesthetically pleasing but often wreaks havoc on your phone’s auto exposure.
Counteract this by underexposing your image manually, embracing and enhancing the low-key, atmospheric lighting rather than fighting it. Increased contrast and strong shadows can make for bold, evocative images.
Don’t be afraid to get artistic with composition either. Off-kilter angles, foreground obstructions (e.g., menus, utensils, glassware), shallow depth of field, and playing-up lighting accents (e.g., candles, pendant lights) can produce eye-catching drama.
It’s easy to go overboard with filters and adjustments, resulting in an image that looks fake or over-processed.
The key is to edit sparingly, using only the tools that genuinely enhance the image without altering its natural appearance.
Start with basic adjustments like cropping, straightening, and exposure correction. Then, if needed, you can play with contrast, saturation, and sharpness to make the colors pop and the details stand out.
Try using an app like Snapseed or Lightroom Mobile for more advanced editing. These powerful tools offer a range of precise controls for fine-tuning your images, from selective adjustments to healing brushes.
If you’re an iPhone user, you can also take advantage of the built-in editing tools in the Photos app. These include options for adjusting brilliance, highlights, shadows, and even applying selective color adjustments.
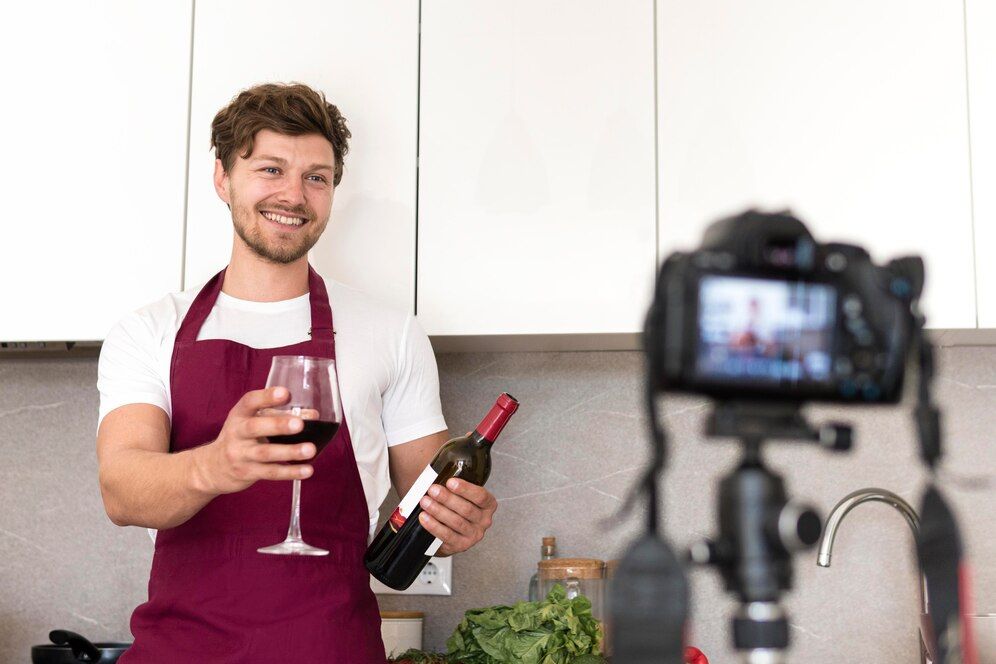
Now that we have covered food photography tips your restaurant could use, how about diving into the art of food videos and restaurant video marketing? Read this guide.
When it comes to food photography, countless little details can make or break your shots.
Below we explore these two common pitfalls and how you can steer clear of them to create food photos that look good enough to eat.
Overcrowding the frame is a surefire way to create a cluttered, confusing image.
Instead, remember that food photography is all about focus. Zoom in on the most appetizing elements and hero ingredients.
And, remember, you’re telling a story with your image. Each element should have a purpose.
So, be ruthless in your editing. Ask yourself, “Does this add value to the shot?” If the answer is no, out it goes!
A cluttered or distracting background can pull attention away from your food. Aim for a clean, simple backdrop that complements your dish.
But don’t just settle for any old surface. Get creative!
Just remember, the background should enhance, not compete with, your main subject.